
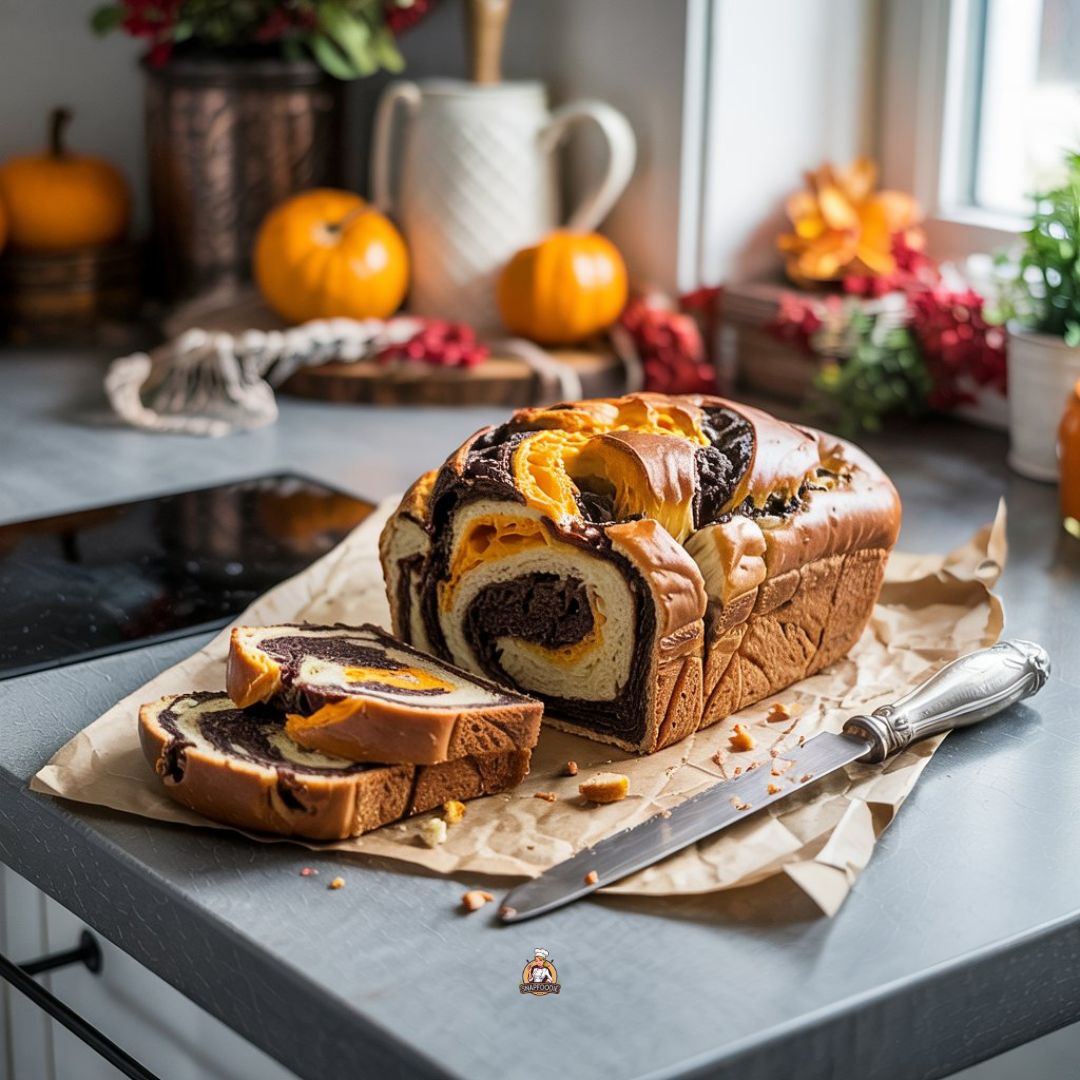
There’s something truly magical about combining colors and flavors in baking, and this Orange and Black Marble Bread is a perfect example! 🍞
The swirl of orange and chocolate creates a stunning pattern that’s as fun to make as it is to eat.
It’s not only delicious but also a feast for the eyes.
Whether you’re a seasoned baker or just starting out, this recipe is an exciting adventure into the world of baking.
I’ve always been fascinated by how such simple ingredients can transform into something so delightful.
The bright citrus of the orange pairs wonderfully with the rich, velvety chocolate flavor.
This bread is perfect for breakfast, dessert, or an afternoon snack.
Plus, it’s a great way to impress your friends and family with your baking skills.
Let’s dive into this delightful recipe together!
I promise you’ll have a loaf of bread that’s as beautiful as it is tasty.
Ready to get started?
Grab your apron, and let’s bake some amazing Marble Bread! 🍊🍫

Orange And Black Marble Bread Recipe
Equipment
- Mixing Bowls: You’ll need a few for different mixtures.
- Whisk and Spatula: Essential for mixing.
- Electric Mixer: Optional, but makes mixing easier.
- Measuring cups and spoons: Accuracy matters
- Loaf Pan: Use a 9×5 inch pan for the perfect loaf.
- Parchment Paper: For easy removal from the pan.
Ingredients
- Flour: 2 cups all-purpose.
- Sugar: 1 cup granulated.
- Unsalted Butter: ½ cup softened.
- Eggs: 3 large.
- Milk: ½ cup.
- Baking Powder: 1 tablespoon.
- Vanilla Extract: 1 teaspoon.
- Orange Zest: From one orange.
- Food Coloring: Black and orange.
Instructions
- Prepare: Preheat the oven to 350°F (175°C) and line the loaf pan with parchment paper.
- Mix Base: In a bowl, cream together the butter and sugar until fluffy.
- Add eggs one by one.
- Add Dry Ingredients: Mix flour and baking powder, then add to the wet mixture alternately with milk.
- Flavor: Stir in vanilla and orange zest.
- Color: Divide batter in half.
- Color one half with orange and the other with black food coloring.
- Marble: Drop alternating spoonfuls of each color into the pan.
- Use a knife to swirl for a marble effect.
- Bake: Bake for 50-60 minutes.
- Check with a toothpick to ensure doneness.
Notes
Swirl gently for a dramatic look.
If color intensity is not as expected, add more food coloring.
Store in an airtight container to keep it fresh for days.
This bread is not only tasty but also makes a great Halloween treat or festive appetizer.
Enjoy your creative baking!
🎃 Happy Baking!
Presentation & Serving
I’m thrilled to share how to make my Orange and Black Marble Bread look and taste amazing! 🎉
Here are some fun ideas to present this eye-catching bread.
After the bread cools, slice it up to reveal the beautiful marble pattern.
The striking orange and black swirls create a feast for the eyes!
Here’s how I like to serve it:
- Warm: I quickly heat it up in the oven for a few minutes.
- The warmth makes it taste fresh and delicious.
- With Butter: Add a pat of butter to each slice!
- It melts nicely and adds a rich flavor.
If you’re serving this at a party, try arranging the slices in the shape of a fan.
It’s a super cool and attractive display!
Another fun idea is to layer the slices with cream cheese spread in between.
This adds a creamy texture that pairs well with the bread.
I like to use a pretty platter to serve the bread.
It adds a touch of elegance and makes the colors pop. 🎨
Finally, a sprig of fresh mint on the side gives it a lovely, fresh look.
Plus, it adds a burst of color.
This bread is more than just food—it’s a visual experience!
Enjoy every slice! ❤️
Storage Tips
Storing my Orange and Black Marble Bread just right ensures it stays fresh and tasty! 🍞
I always let the bread cool completely before storing it.
This helps prevent any sogginess.
For short-term storage, I wrap it tightly in plastic wrap or aluminum foil and keep it at room temperature.
It can stay fresh for up to 3 days this way. 🕒
When I want to keep the bread longer, I freeze it. ❄️
Freezing is my go-to method!
I slice the bread first, so I can grab just what I need.
Then, I wrap each slice individually in plastic wrap, followed by a layer of aluminum foil, or place them in a freezer bag with the air squeezed out.
This keeps the slices fresh for up to 3 months.
Reheating
When I’m ready to enjoy my bread again, I just take out the slices I need and let them thaw at room temperature for about 30 minutes.
Then, I pop them in the toaster or a warm oven for a few minutes to revive that fresh-baked taste! 😋
Pro Tip
If I notice any extra moisture when I’m storing the bread, I add a paper towel in the container to absorb it.
This trick helps keep my bread perfect for longer!
Recipe Variation
Hey there! 🍊🖤
Fancy switching things up with some amazing variations for our Orange and Black Marble Bread?
I’ve got you covered!
Check out these fun ideas to make your bread extra special.
Equipment
- Mixing bowls
- Whisk
- Measuring cups
- Loaf pan
Ingredients
- Orange zest: Add a bit more zest for a zingier flavor.
- Cocoa powder: Swap some cocoa with dark chocolate for deeper taste.
- Nuts or seeds: Pecans or chia seeds can add a nice crunch.
- Spices: A dash of cinnamon or nutmeg for warmth.
Instructions
- Mix in different spices for a new flavor.
- Try adding chocolate chunks for a more indulgent bite. 🍫
- To make it even healthier, substitute some flour with whole wheat flour.
Let me know which variation you’re going to try! 😋
Pairing 🍞🍊
When I bake this Orange and Black Marble Bread, I love thinking about what to enjoy it with!
It fits perfectly into breakfast, a snack, or even dessert.
Great Pairings:
- Coffee: A fresh cup of coffee brings out the citrus notes beautifully. ☕
- Tea: Consider a light, fruity tea like chamomile or orange blossom. 🍵
For A Sweet Touch:
- Honey: A drizzle of honey enhances the sweetness. 🍯
- Jam: Try it with apricot or berry jam for a fruity kick. 🍓
Savory Options:
- Cream Cheese: Spread some cream cheese on top for a creamy contrast. 🧀
- Butter: Keep it simple with a pat of salted butter.
Best For Dessert:
- Ice Cream: A scoop of vanilla ice cream makes it extra special. 🍨
- Whipped Cream: Add a dollop of whipped cream for a soft and airy texture.
I find these pairings make the bread even more enjoyable!
What do you think? 🥳
Tips & Tricks
When making this Orange and Black Marble Bread, let me share some secrets to make it amazing! 😊
Equipment 🛠️
- Two mixing bowls
- Whisk or electric mixer
- Loaf pan
- Spoon or spatula
Ingredients 🍞
- Fresh oranges for the zest
- Natural food coloring for vibrant hues
Instructions 📋
Tip 1: Use fresh orange juice instead of water for a richer taste.
The natural sweetness adds a fantastic flavor!
Tip 2: For the black color, add a dash of cocoa.
It deepens the color and adds a yummy chocolate note. 🍫
Tip 3: When mixing, swirl gently!
A soft touch keeps the marbled pattern beautiful and not muddled.
Tip 4: Let the bread cool completely before slicing.
This makes cutting easier and neater.
Tip 5: Experiment with nuts or dried fruit for extra crunch and flavor.
Just mix them into your batter before baking.
These simple tips will make your bread both fun and delightful to eat!
Enjoy baking and don’t forget to share your masterpiece with family or friends! 🎉

Frequently Asked Questions
I’m excited to dive into some common questions about making orange and black marble bread!
Discover how to achieve the most vibrant colors, create perfect swirls, choose the best flour, bake for the perfect crust, pick the best glaze, and keep those marbled patterns distinct. 🎉🍞
What’s the secret to making the most vibrant orange and black colors in marble bread?
To get the brightest colors, I use food gel coloring.
It’s more intense than liquid color and doesn’t affect the batter’s texture.
I also make sure my batter is well mixed before dividing and coloring. 🧡🖤
Can you share some tips for creating the perfect swirl in a marble bread?
For amazing swirls, I pour the batters in alternating spoonfuls.
Then, I take a skewer and swirl from side to side gently.
It’s like painting a masterpiece! 🎨
Keep a steady hand for defined swirls.
What are the best types of flour to use for a fluffy and moist orange and black marble bread?
I like using all-purpose flour because it balances fluffiness and structure.
If I want extra moisture, I sometimes swap a portion for cake flour.
The result? Soft and tender bread that melts in my mouth. 😋
How long should I bake my orange and black marble bread to get a perfect crust?
I usually bake the bread at 350°F (175°C) for about 45-50 minutes.
I always check for doneness with a toothpick.
It should come out clean!
Baking times might vary, so I keep an eye on it. 🔍
What icing or glaze complements the flavors of orange and black marble bread wonderfully?
A simple orange glaze really enhances the flavors.
I mix powdered sugar with orange juice and a little zest for a fresh punch.
It adds a perfect touch of sweetness and shine. 🍊✨
Are there any special tricks to ensuring the marbling remains distinct after baking?
To keep marbling sharp, I avoid over-mixing my batter.
Once swirled, I handle the batter gently.
Preheating the oven helps set the batter quickly and preserves those beautiful patterns. 🍞
Recent Posts
15 Non-Alcoholic Halloween Punch Recipes: Spooktacular Sips for Your Party!
Halloween is coming, and I'm all about making the party extra fun and festive! 🎃 Nothing sets the mood better than a delicious punch that everyone can enjoy. These non-alcoholic options are...
15 Easy Halloween Bread Recipes You’ll Want to Bake Right Now!
Halloween is one of my favorite times to bake! 🎃 It’s the perfect excuse to try some fun and spooky bread recipes. Each loaf adds a touch of festivity to your table and fills the house...